How to add a shared mailbox in Nine.
It's a kind of workaround even though this isn’t standard behavior or common practice as only users with permission that can access a shared mailbox, now you can access the shared mailbox with Nine and it does work only with Office 365! This way is to register the shared mailbox as an IMAP account. Please follow the below steps.
1. Go to the following path.
Nine - Settings > Add Account
2. Type a shared mailbox of your organization in the "Email address" field. (i.e., shared_mailbox@example.com)
3. Select “Manual setup".
4. Select "IMAP".
5. Fill out the following information in the "Add your IMAP account" screen.
- Email address – shared_mailbox@example.com
- Password - type the password of your account that has permission on the shared mailbox.
The "Manual Setup" will be activated if you input the password. And then, tap "Manual Setup".
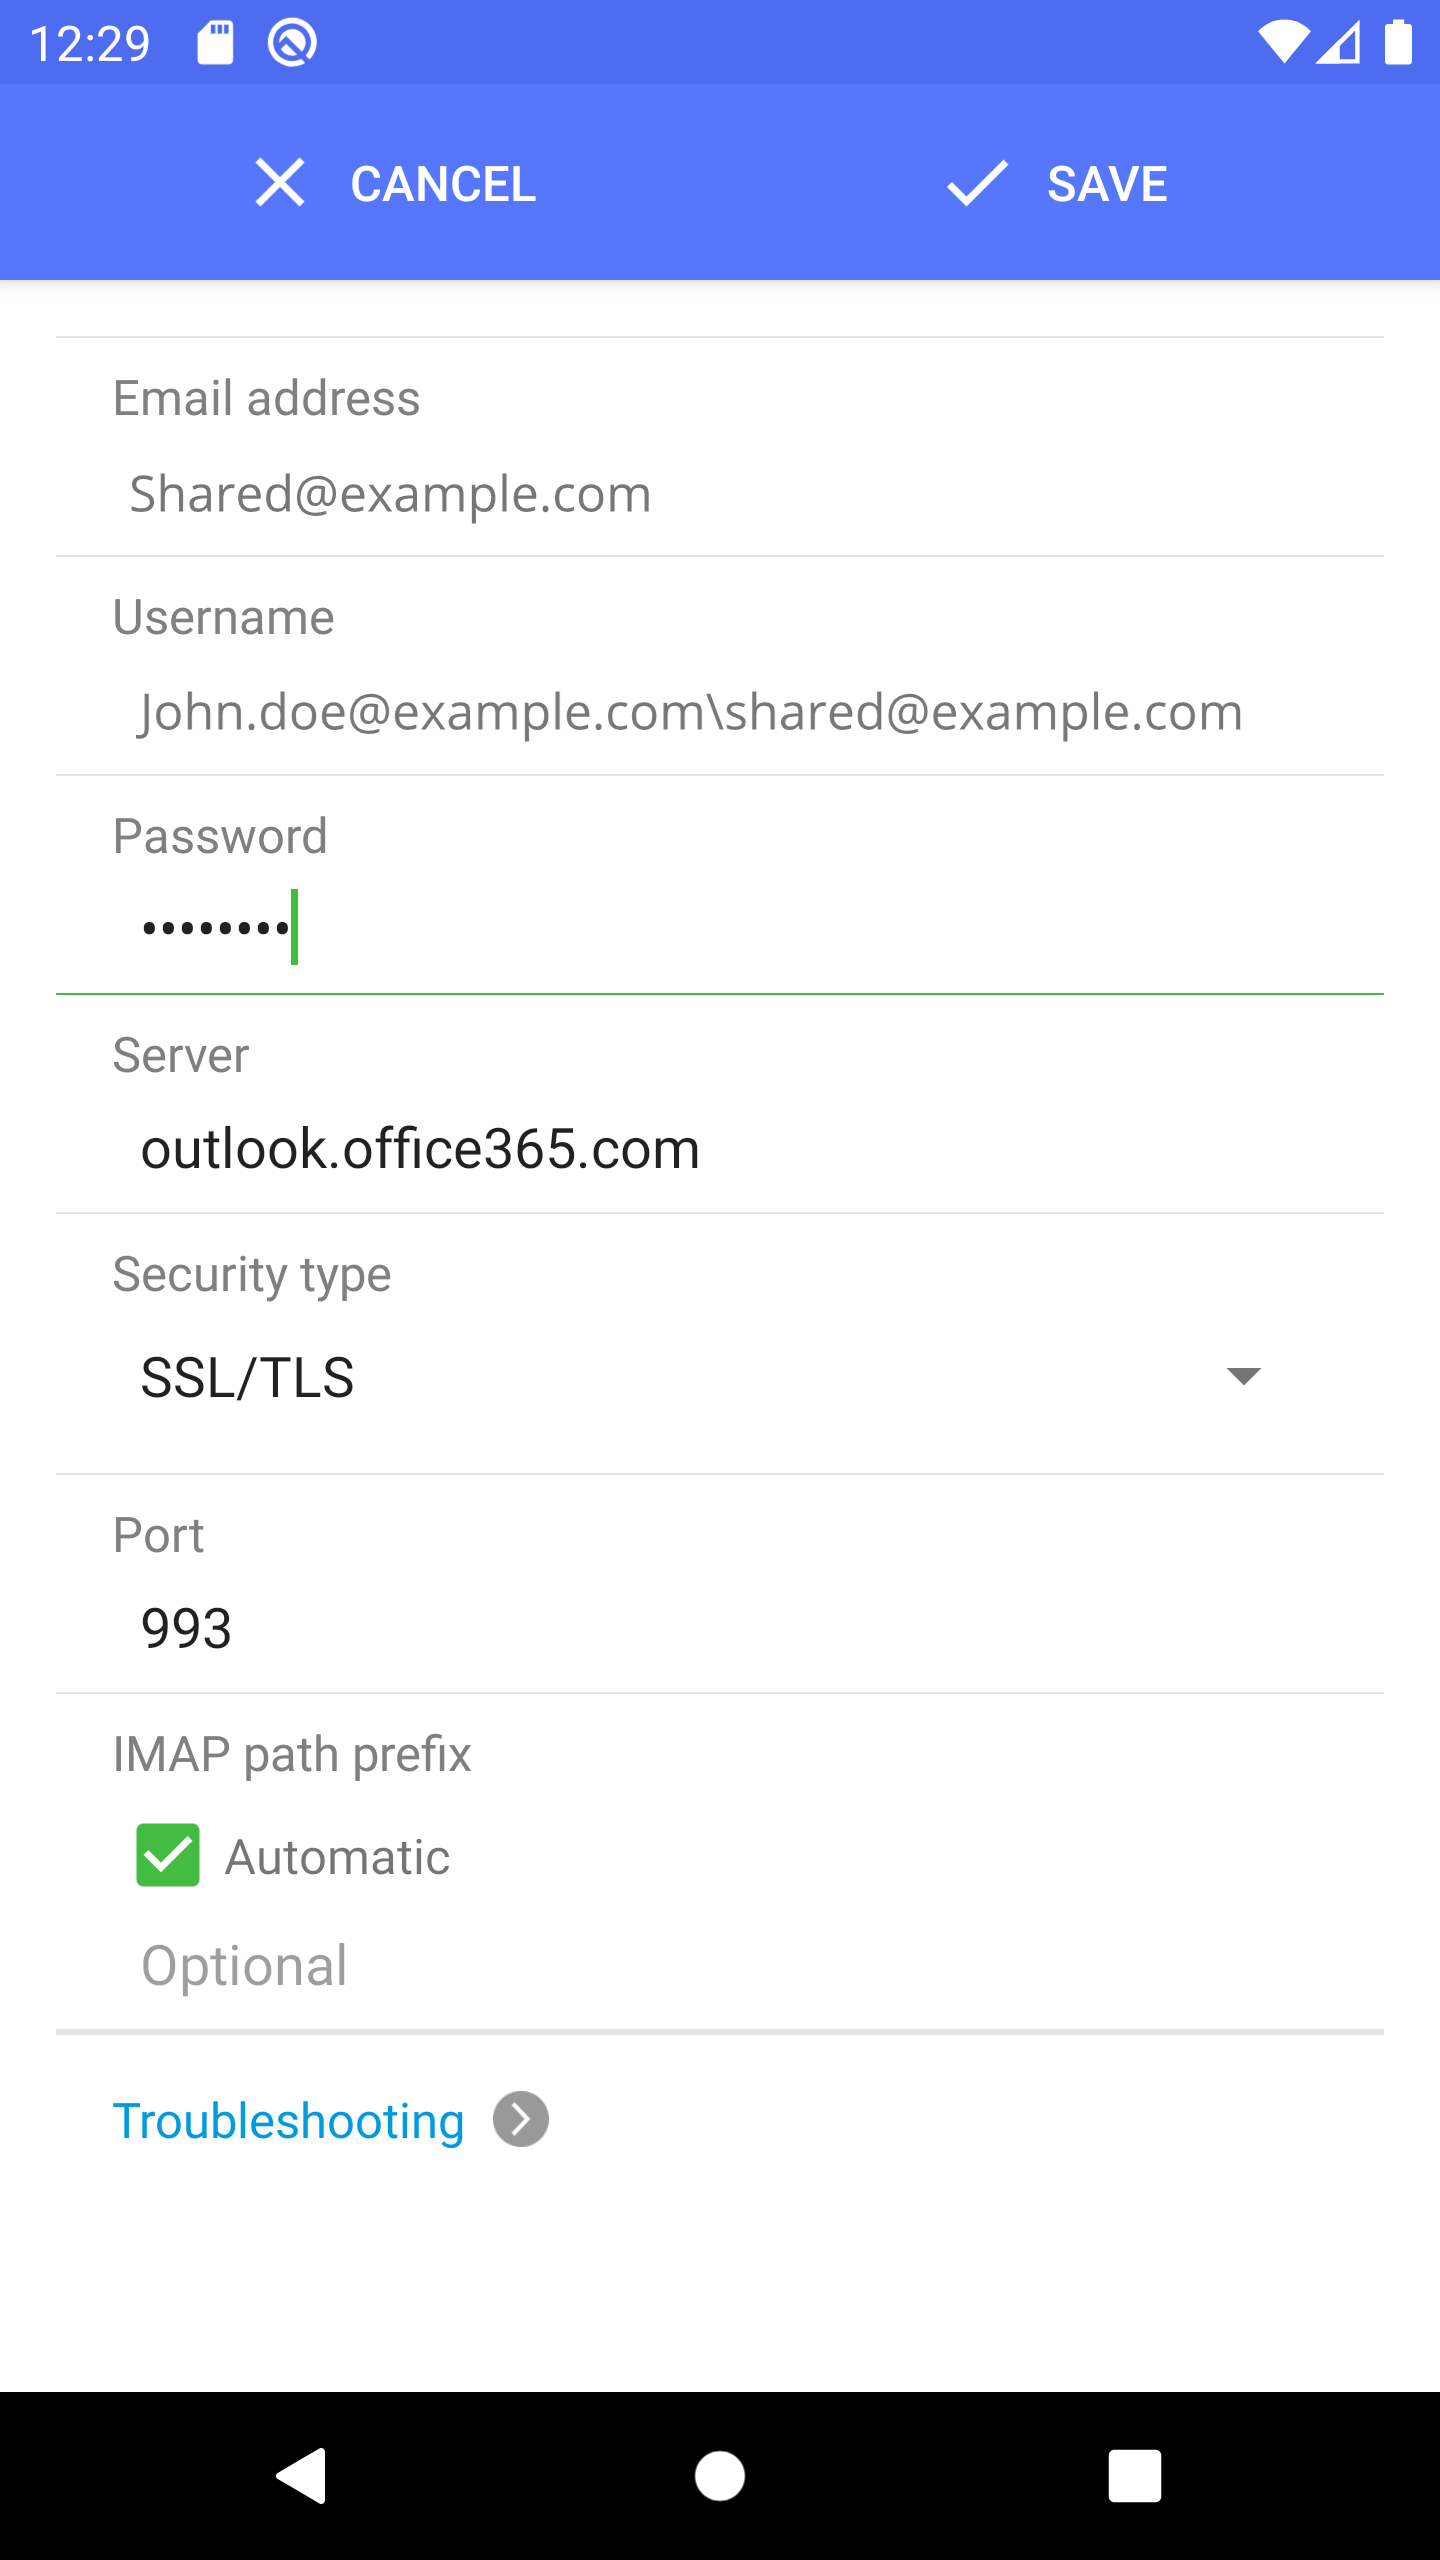
Now the screen you are seeing is the setup screen of the incoming mail.
Incoming mail server settings
- Change Username as below
your email address\shared_mailbox@example.com (for example, john.doe@example.com\shared_mailbox@example.com)
- Change the server for Incoming mail
Server: outlook.office365.com
- Security type: SSL/TLS
- Port: 993
- Tap "Next"
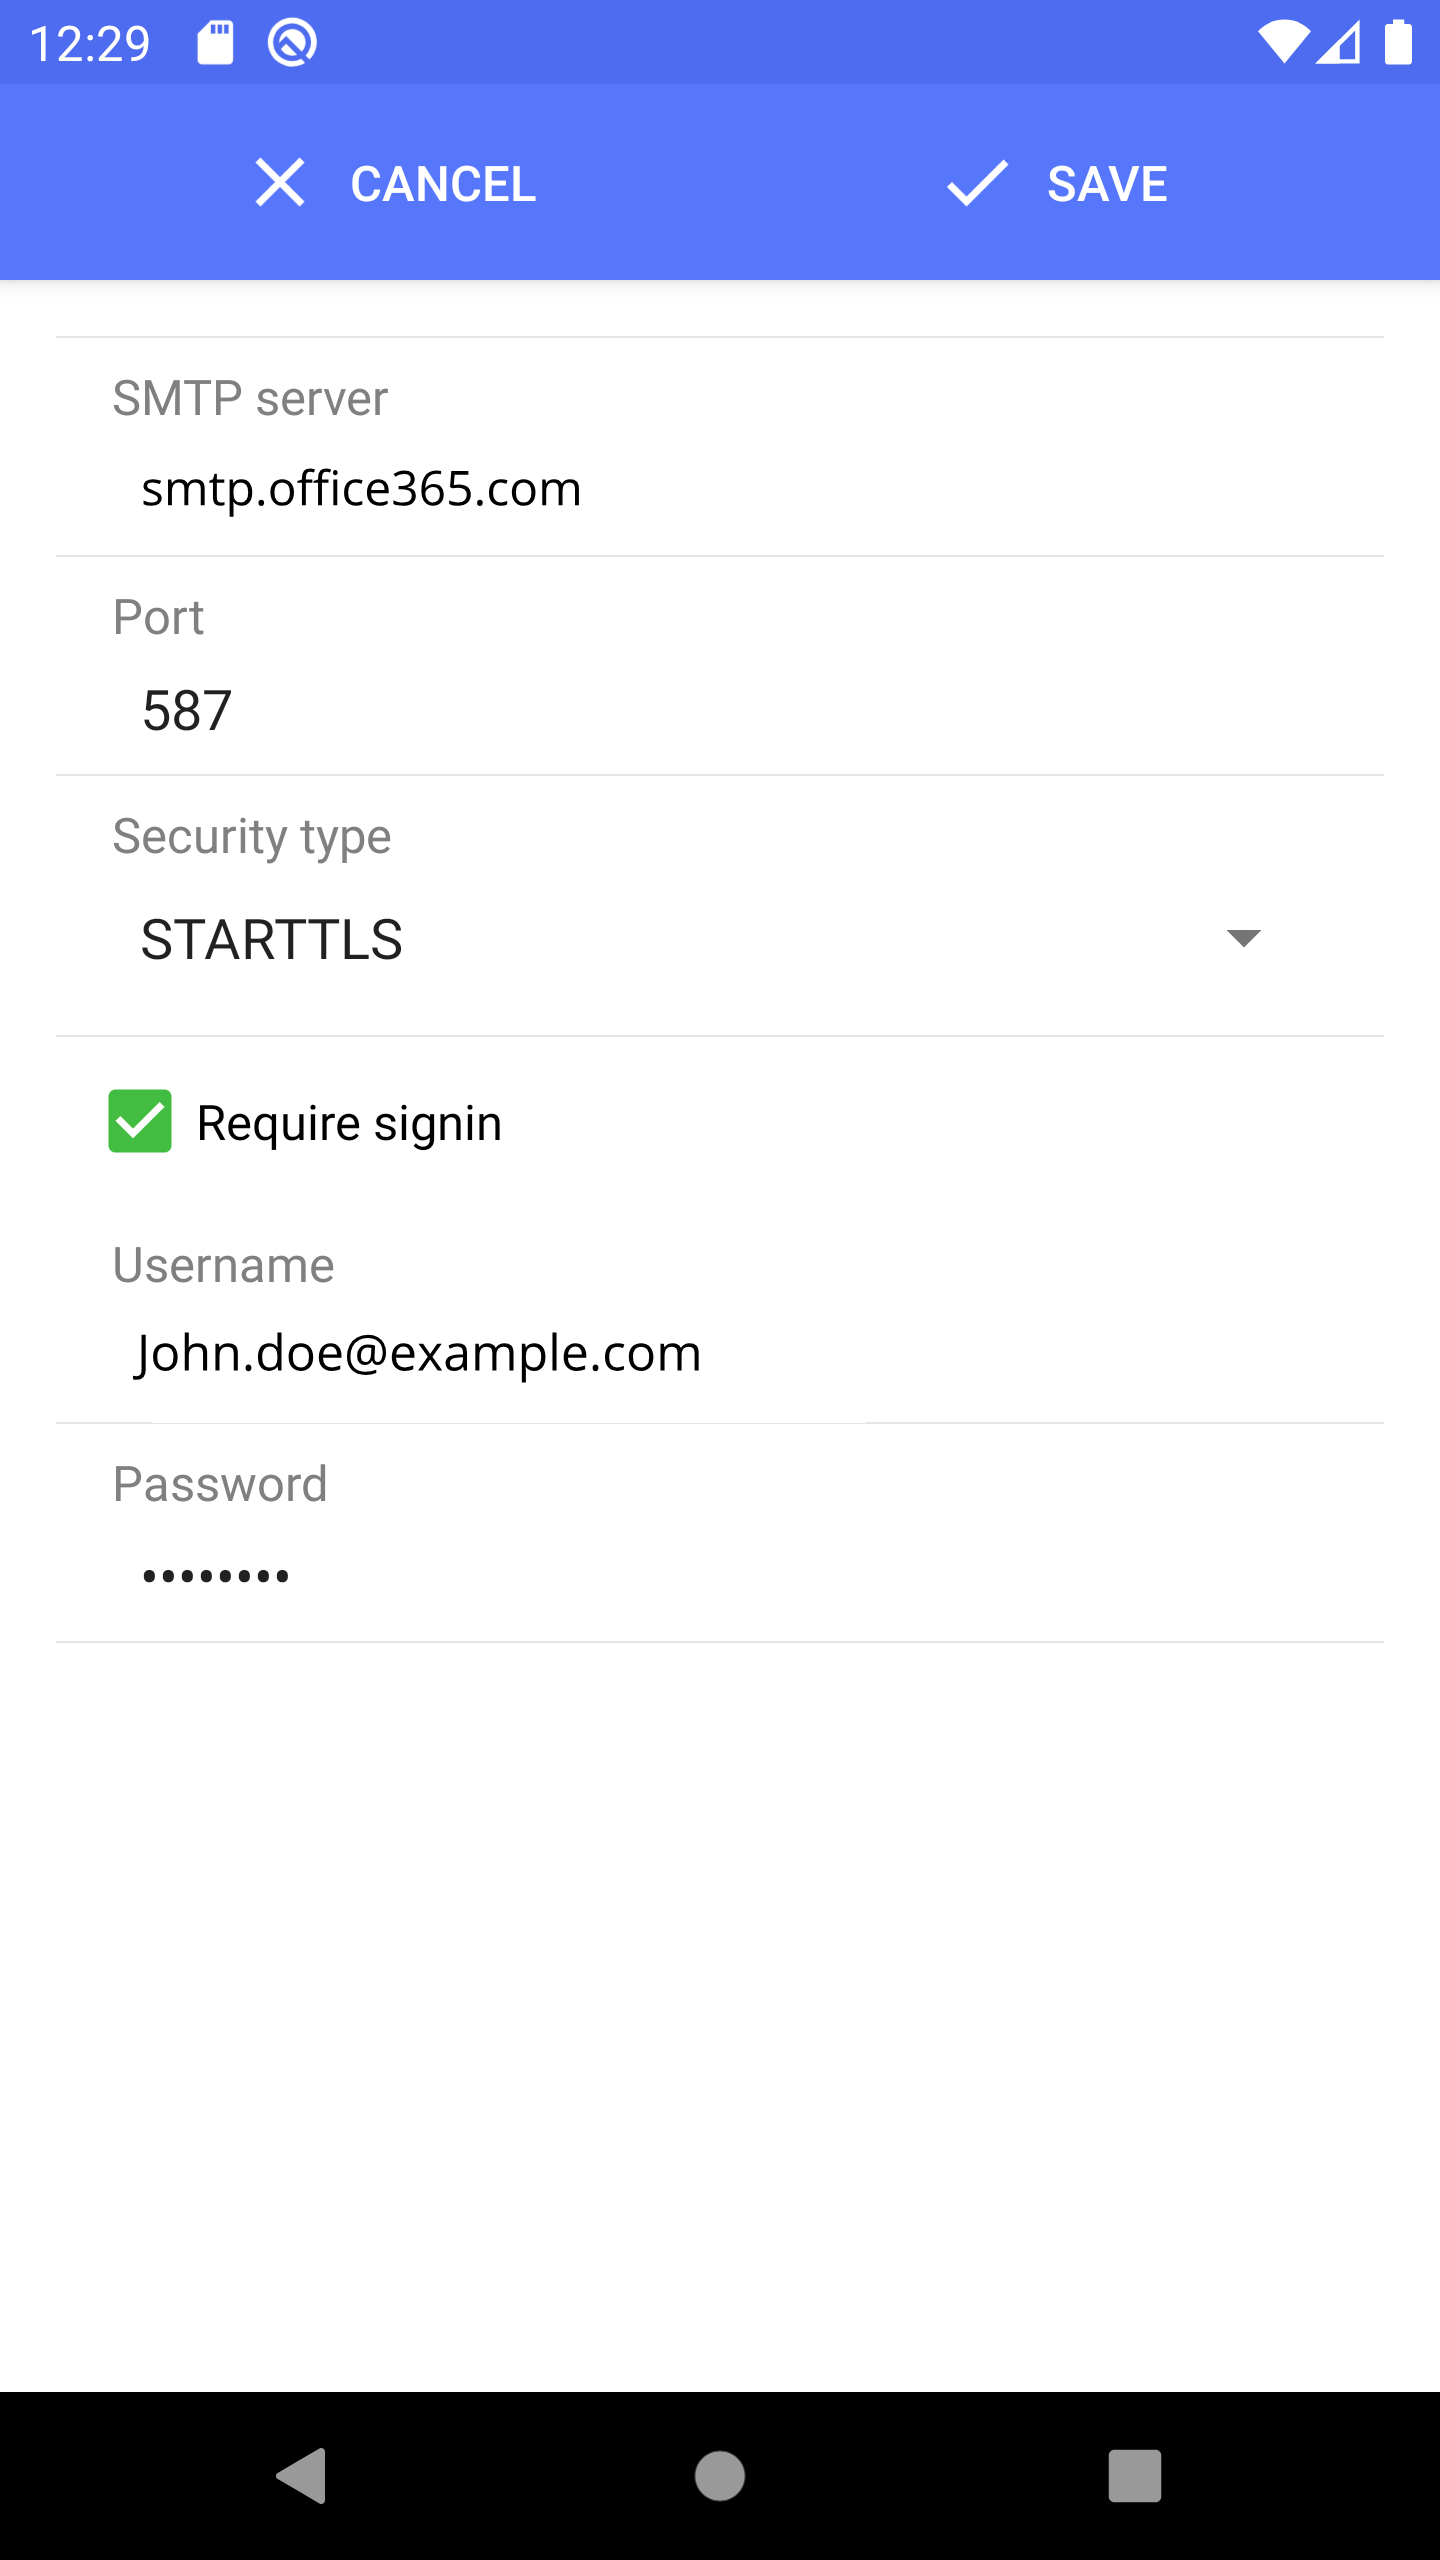
Outgoing mail server settings
- Change SMTP server as below.
smtp.office365.com
- Port: 587
- Security type: STARTTLS
- You should tick “Require sign-in”. And you edit the username for sign-in of the shared mailbox as below. You need to delete the shared email address in leaving your email address.
- your email address\shared_mailbox@example.com for example, john.doe@example.com\shared_mailbox@example.com => Your email address (for example, john.doe@example.com)
- Tap "Next"
And the adding account settings pass successfully and tap the "Next", you can go back to the mailbox. Now you can see the shared mailbox in the navigation drawer of Nine.
 |  |